Integrate Google Calender with ServiceNow – How to read the Docs – Integration Part 1
Hi Developers,
I’m back with a three part article to Schedule a Google Meet with Virtual Agent.
In this first part I’ll be guiding you on how to connect ServiceNow with Google APIs for Calendar.
In next two parts we will be discussing how to create a REST Message and use it in Virtual Agent to scheduling meetings.
So let’s begin. ..
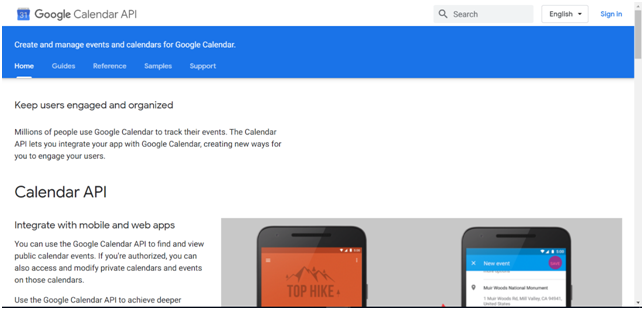
Step 1) Visit https://developers.google.com/calendar and click ‘Sign in’
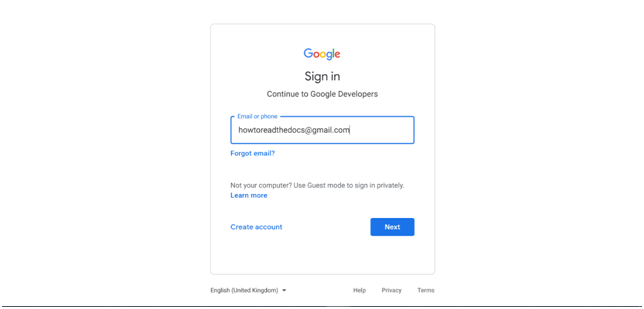
Step 2) Login with your Gmail credentials
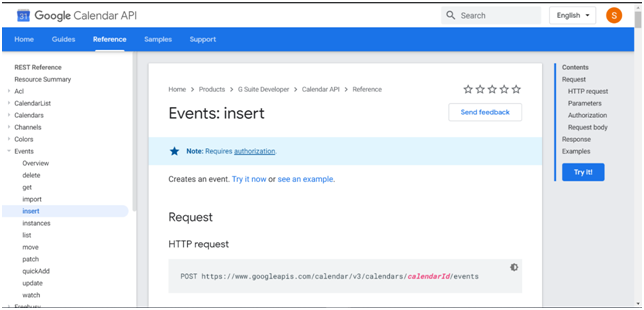
Step 3) Navigate to the section ‘Reference’ and select ‘insert’ under ‘Events’ menu options
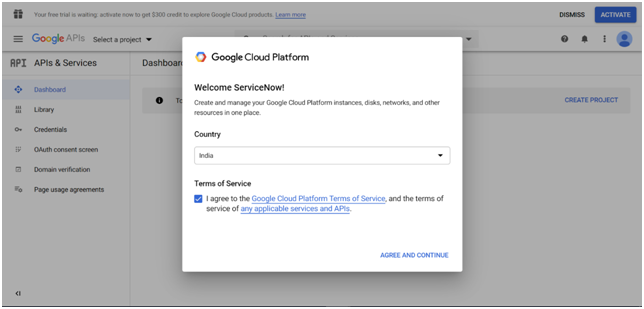
Step 4) In new tab visit https://console.developers.google.com/, Select your country, accept the terms and click ‘AGREE AND CONTINUE’
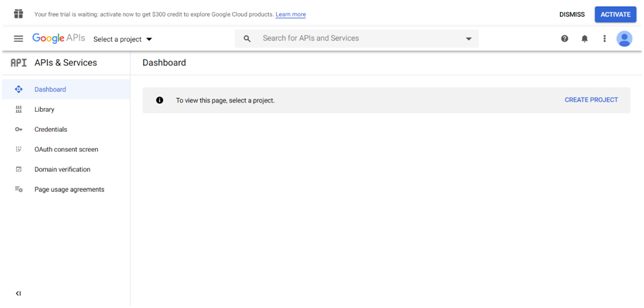
Step 5) Click ‘CREATE PROJECT’
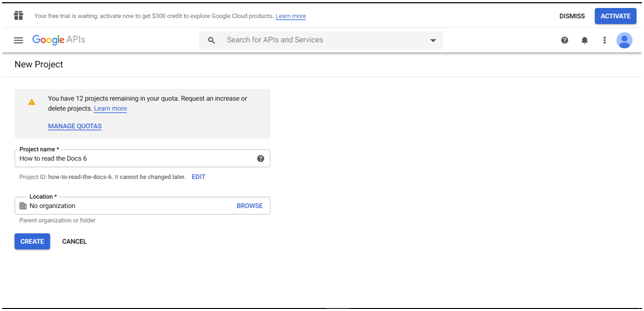
Step 6) Give it a unique name and click ‘CREATE’
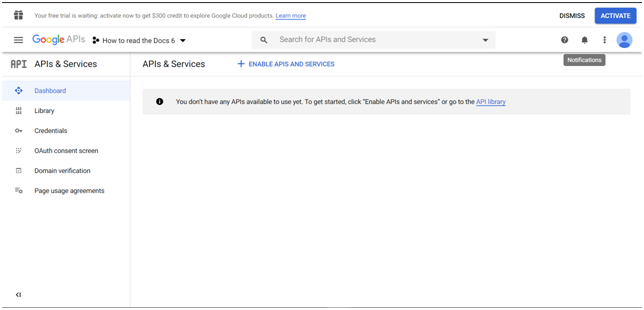
Step 7) Click ‘ENABLE APIS AND SERVICES’
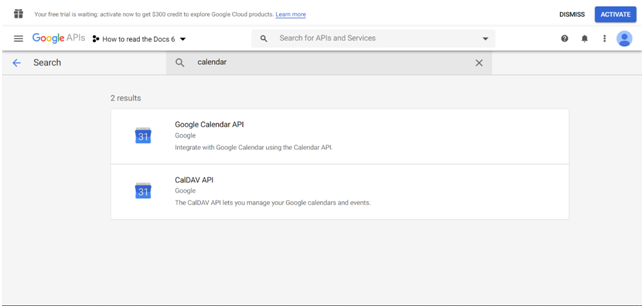
Step 8) Search for calendar and select ‘Google Calendar API’
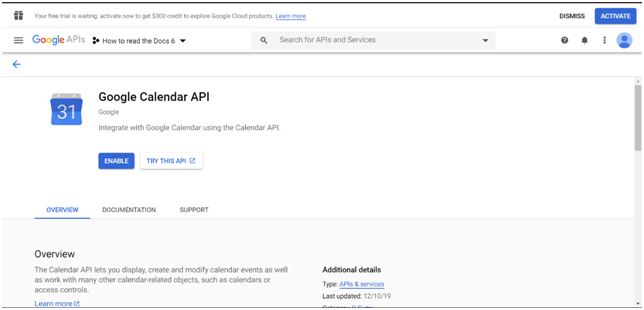
Step 9) Click ‘ENABLE’
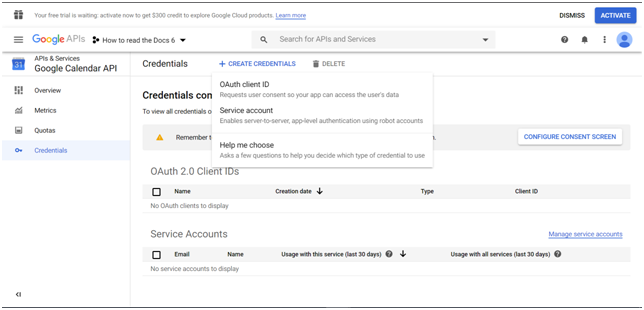
Step 10) Select ‘Credentials’ from menu options

Step 11) Click ‘CREATE CREDENTIALS’ and select OAuth client ID’
Step 12) Select ‘CONFIGURE CONSENT SCREEN’
Step 13) Select ‘External’ and click ‘CREATE’
Step 14) Give it a unique name
Step 15) Click ‘Save’
Step 16) Navigate back to Credentials and select ‘OAuth client ID’ under ‘CREATE CREDENTIALS’
Step 17) Select Application type as ‘Web application’ and give it a unique name
Step 18) Click ‘CREATE’
Step 19) Note down the OAuth ‘Client ID’ & ‘Client Secret’ and click ‘OK’
Step 20) Click the download icon beside your Client ID
Step 21) Open the downloaded json file in text editor
Step 22) In ServiceNow, Navigate to System OAuth > Application Registry and click ‘New’
Step 23) Select ‘Connect to a third party OAuth Provider’
Step 24) Give it a unique name and copy to fill the information (client_id, auth_uri, token_uri, client_secret) from the downloaded json file opened in text editor
Step 25) Select ‘Default Grant type’ as ‘Authorization Code’
Step 26) Under the section ‘OAuth Entity Scopes’ create two records as follows and click ‘Submit’
Calendar : https://www.googleapis.com/auth/calendar
CalendarEvent : https://www.googleapis.com/auth/calendar.events
The above information is available and copied from the API Reference web page opened in step 3
Step 27) Open the record again and copy the Redirect URL
Step 28) Navigate back to the page opened in step 20 and click on your OAuth 2.0 Client ID record
Step 29) Click “ADD URI’ under ‘Authorized redirect URIs’, paste the Redirect URI Copied from step 27 and click ‘SAVE’
So here we are done with the first part of this three part article and we have successfully created an OAuth Connection between Google Calendar APIs with ServiceNow.
Please go through the second part of this article to learn how to create a REST Message to use this API.
Thank You,
Vishal Ingle
ServiceNow Certified System Administrator
DxSherpa Technologies Pvt. Ltd.
Maharashtra, IN.